This post may contain affiliate links. If you buy through them, we may earn a small commission at no extra cost to you. Our disclosure.

These gallery wall ideas for beginners show exactly where to hang the first frame and what to add next.
Most people don’t struggle with a gallery wall because of taste. They struggle because of the first frame. Where does it go? How high? What if the next one looks off?
If you’ve been staring at a blank wall with a stack of frames on the floor, you’re in good company. Every wall in this post started the same way, with one decision and a few simple habits.
Below you’ll find 10 gallery wall ideas for beginners, pulled from real rooms. Some are bold and colorful. Some are calm and neutral. A few use unframed prints, plates, and even a guitar. Each one comes with a clear starting point, so you’ll know exactly where the first frame goes and what comes next.
You don’t need a perfect plan or a matching set of expensive frames. You need an anchor, a rule to repeat, and a little patience. Pick the idea closest to your room and start there.
1. Hang the Biggest Frame First and Let the Smaller Ones Circle It
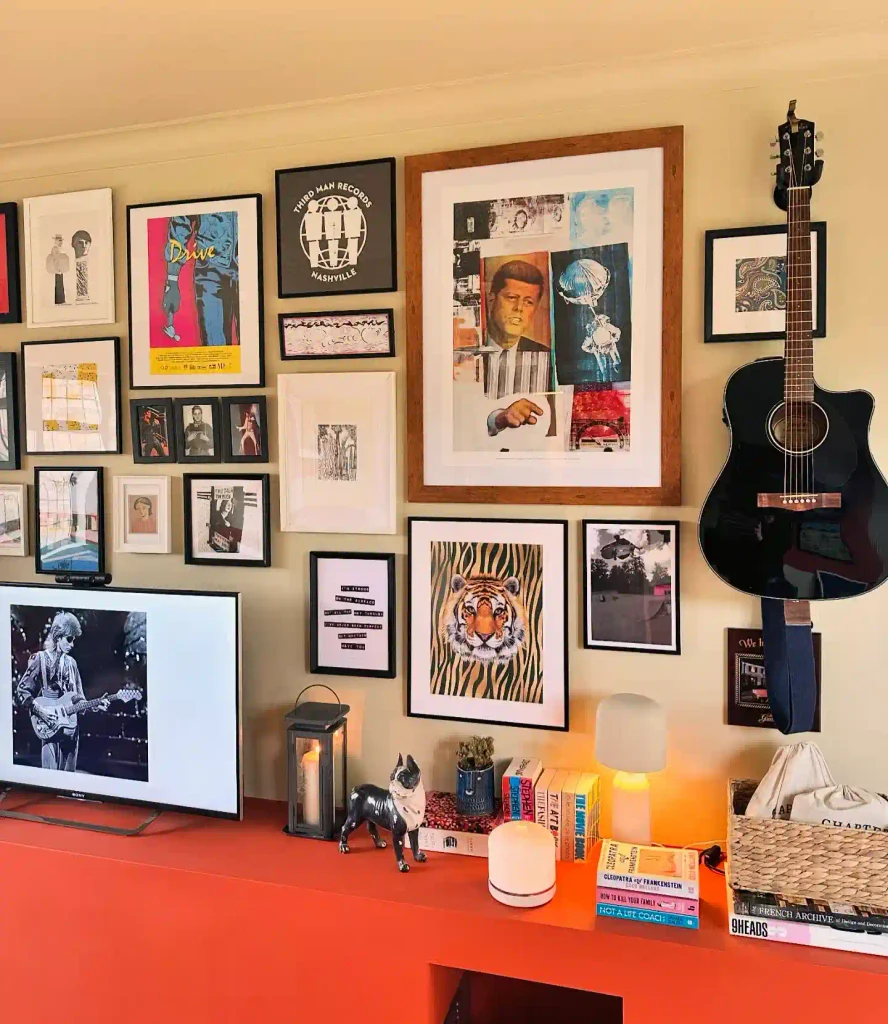
Hang the biggest frame first. It becomes the anchor, and every smaller piece suddenly has an obvious place to sit.
Here the large wood frame sits near the middle of the wall, just above the shelf line. Mid sized black and white frames step out to the left, and small ones fill the gaps. Even the guitar on the right works like an extra piece of art, so the edge of the wall never feels empty.
The frame colors are all over the place, but the wall paint is calm. Busy prints, quiet wall.
Pick your largest frame and hold it on the wall at about eye level.
Hang it, then step back and look before adding anything else.
Add the next two biggest frames beside it, with small, even gaps.
Fill the leftover gaps with the smallest frames last.
2. Tape Unframed Prints Between Your Frames to Fill a Wall Fast
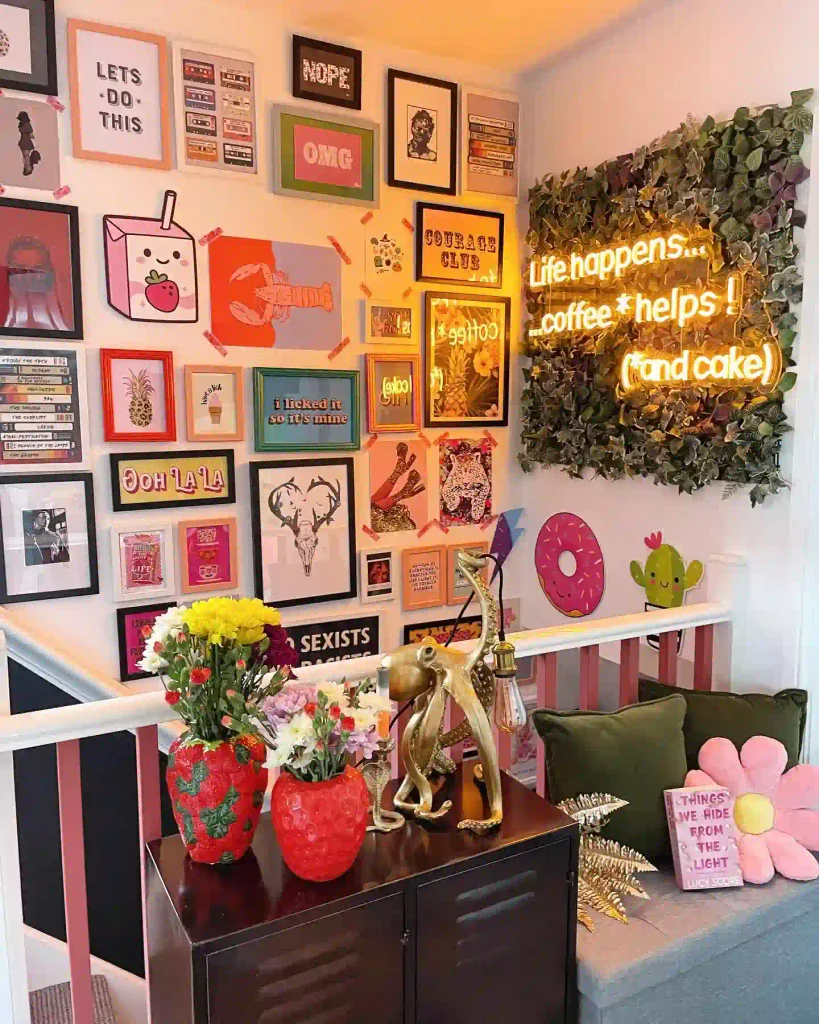
Frames add up quickly, so this wall skips a few. Framed posters in orange, pink, green, and black set the rhythm. Unframed prints held up with patterned tape fill the spaces between them, and a couple of wall stickers near the lower edge look like they were planned all along.
It’s a good trick when you’re nervous about committing. You can swap a taped print in a minute and test the layout before you buy a single new frame.
Just keep the tape simple if your prints are already loud.
3. Matching Frames and Black and White Photos Make a Gallery Wall You Can’t Get Wrong

If mixing styles makes you nervous, copy this wall instead.
- Six walnut toned frames, all with white mats
- Black and white family photos, so no color fights the room
- Small, even gaps between every frame
- The whole group sits above the sideboard instead of floating alone
The wood frames echo the sideboard and the brown cushions, which ties the wall to the room.
| Matching frames | Mixed frames |
|---|---|
| Looks tidy right away | Looks collected over time |
| Easy to plan on paper | Needs more testing on the floor |
| Best for photos | Best for art and prints |
4. Let Your Sofa Decide How Wide the Gallery Wall Should Be
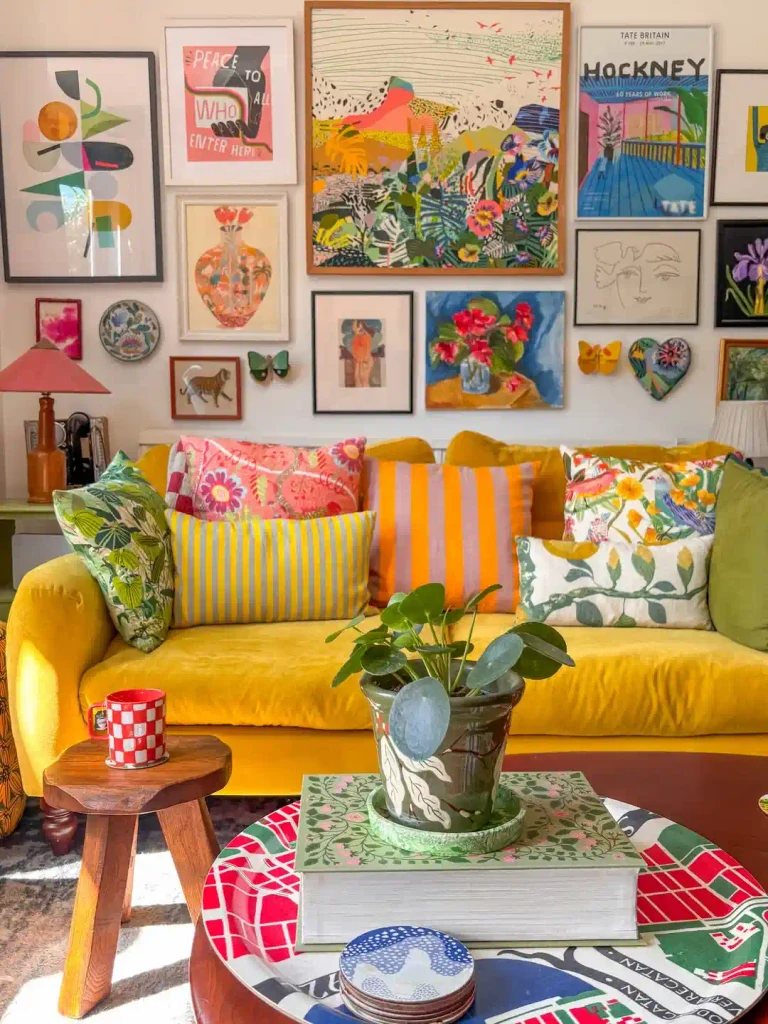
Your sofa already tells you where the gallery wall should start and stop. Here the art stays above the seating, so the whole corner reads as one group.
Try this order:
- Hang the biggest print near the middle.
- Add a tall frame on one side and a row of small ones below.
- Fill leftover gaps with flat objects, like a small plate, a heart shaped ceramic piece, or a wall butterfly.
Those little objects break up all the rectangles, which is why the wall never feels stiff.
Start the bottom row just above the sofa back.
Tuck small plates or butterflies into empty corners.
Hanging frames low enough for cushions to bump them.
Stretching the wall far past the edges of the sofa.
5. Pick Three Colors and One Frame Finish for a Calm Bedroom Wall

Bedrooms ask for quiet walls. This one stays inside three colors: warm cream, sage green, and a soft honey brown pulled from the dried grasses in the photo prints.
Every frame is the same light wood, so the mix of line drawings, abstract shapes, and handwritten quotes still looks calm. The frames sit in two tidy rows above the bed, with the larger prints on the lower row.
Choose your palette first. The prints come second.
💡 Quick Tip
Wait to buy frames until you’ve picked three colors. Then choose prints that already use them, and one frame finish for every piece.
6. Gallery Wall Ideas for a Tricky Corner: Wrap Matching Frames Around the Bend
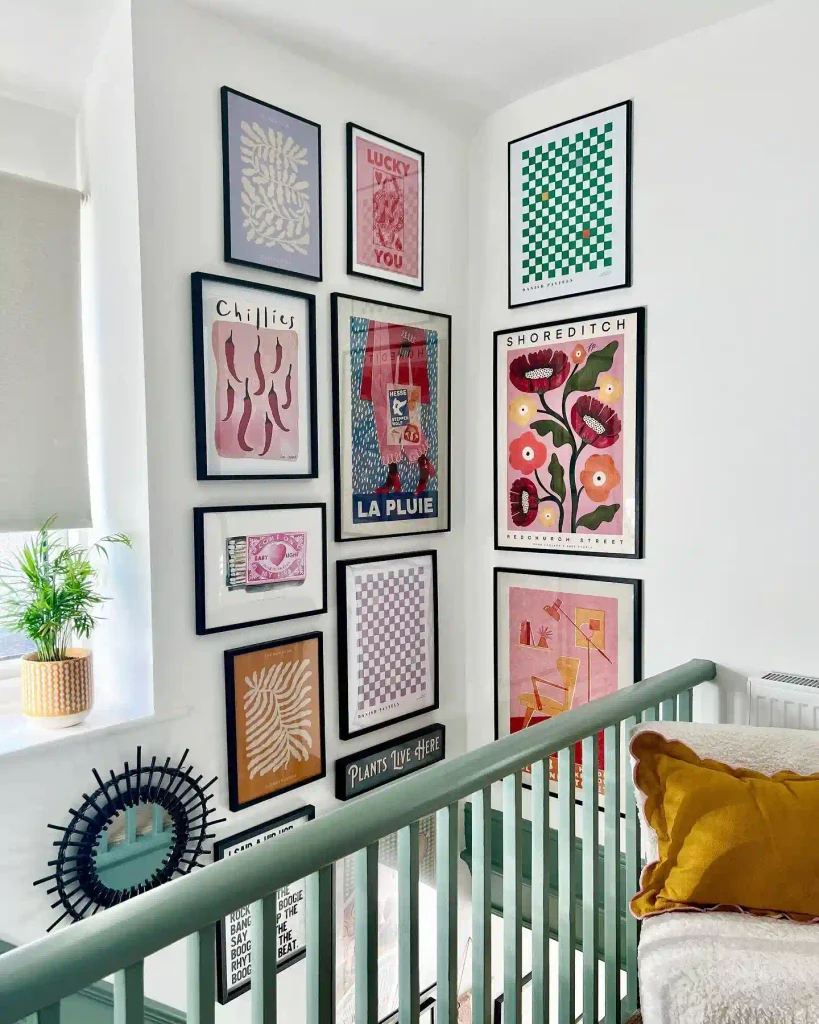
Stairs and corners scare beginners, but one rule solves most of it: match the frames. Every print here wears a thin black frame, so pink chillies, purple checks, and a big floral poster sit together without arguing.
The prints run in two tall columns, one on each side of the corner, with the tallest posters in the middle of each column. A few small text prints along the bottom edge finish the wall instead of leaving a hard stop.
Small warning: corner walls are rarely square, so lay everything out on the floor first.
7. Mix Old Gold Frames With Modern Prints on a Colored Wall
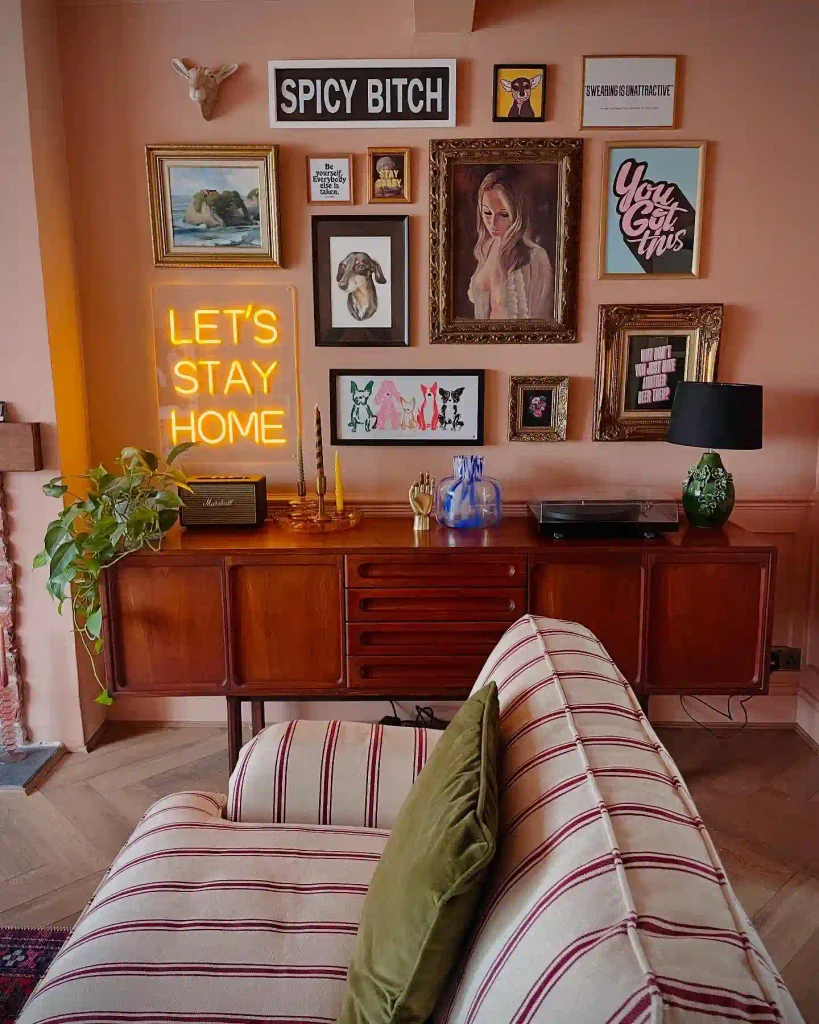
Old frames and new prints can share a wall if one thing repeats. Here it’s the gold. Several ornate gold frames hold a seascape, a portrait, and a small floral, so the bold lettering prints around them feel like they belong.
Black frames fill in the rest, and the warm pink wall softens the contrast. A neon sign sits low on the left like an extra frame and gives the group a glowing corner.
Secondhand frames are worth a look. You can put any print inside.
Recreate this look
8. In a Tall Room, Hang the Gallery Low Instead of Chasing the Ceiling
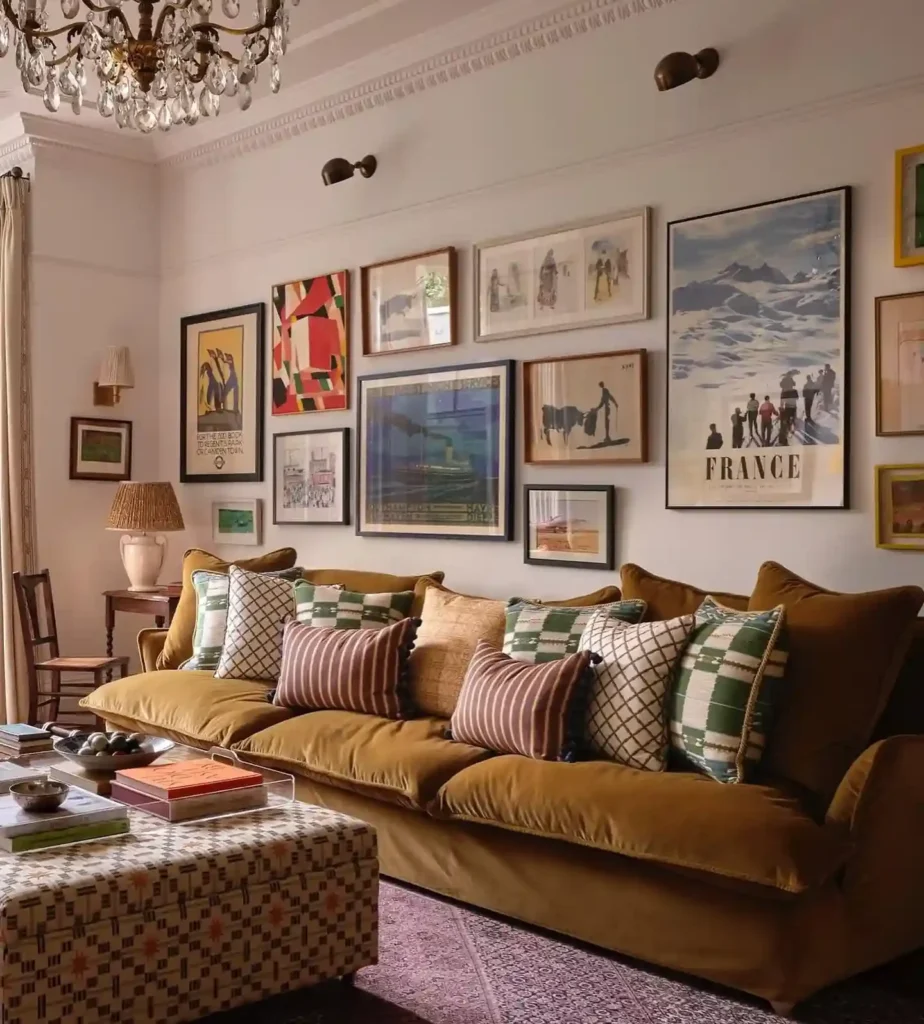
Tall ceilings tempt you to hang art high. Resist it. In this room the frames stay in the middle band of the wall, close to the sofa back, so the art and the furniture read as one scene.
Two things help:
- A tall vintage style poster on the right that sets the height
- Brass wall lights above the frames, which keep the upper wall from feeling bare
The mix of black, wood, and cream frames stays calm because the wall behind it is a soft neutral.
Frames hung high near the ceiling, with a big empty gap between the art and the sofa.
Frames sit just above the sofa back, so the art and the seating feel connected.
9. Start in the Hallway and Let Wall Lights Frame Your Cluster
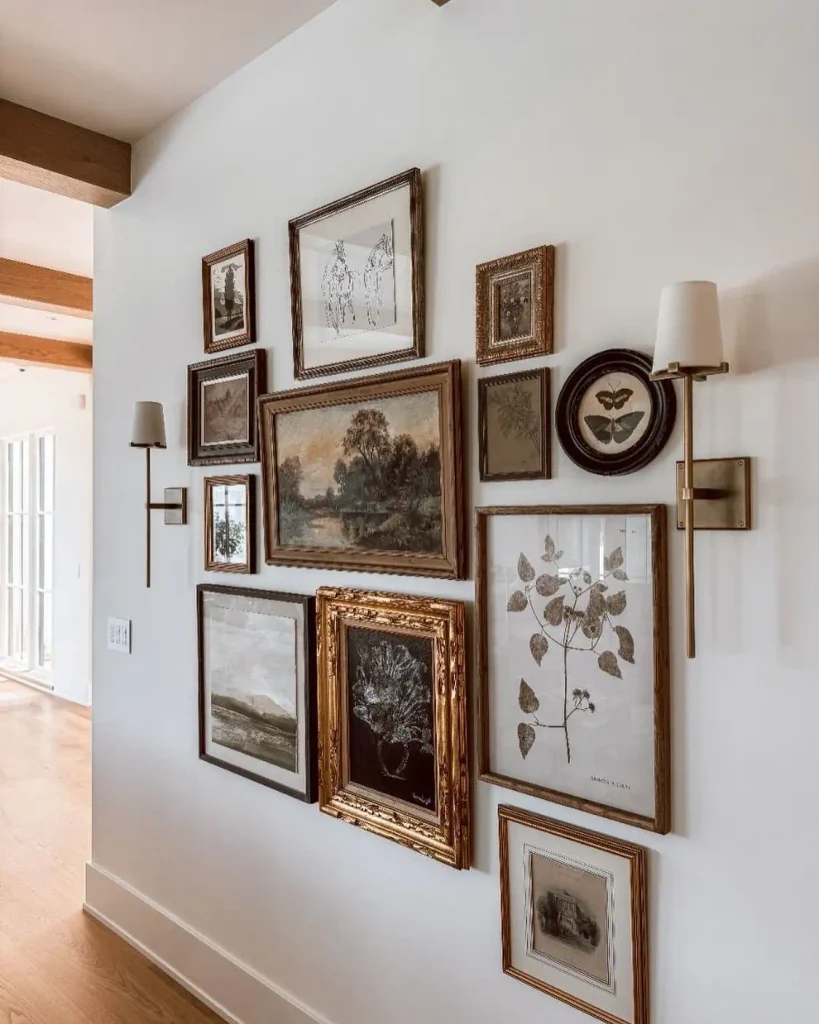
Hallways are the easiest place to begin. Nobody sits and stares at them, so the pressure is low.
This wall keeps its colors muted: aged browns, olive, cream, and a little gold. A large landscape painting sits in the middle, a tall botanical print hangs lower right, and a round frame with butterflies breaks up all the squares. Brass wall lights on each side hold the whole cluster in place.
Leave the outer edges loose and uneven. Straight edges look stiff in a hall.
Wall lights on both sides act like bookends, so a group of different sized frames still looks planned.
10. Add Plates and an Empty Frame So Your Wall Holds More Than Art
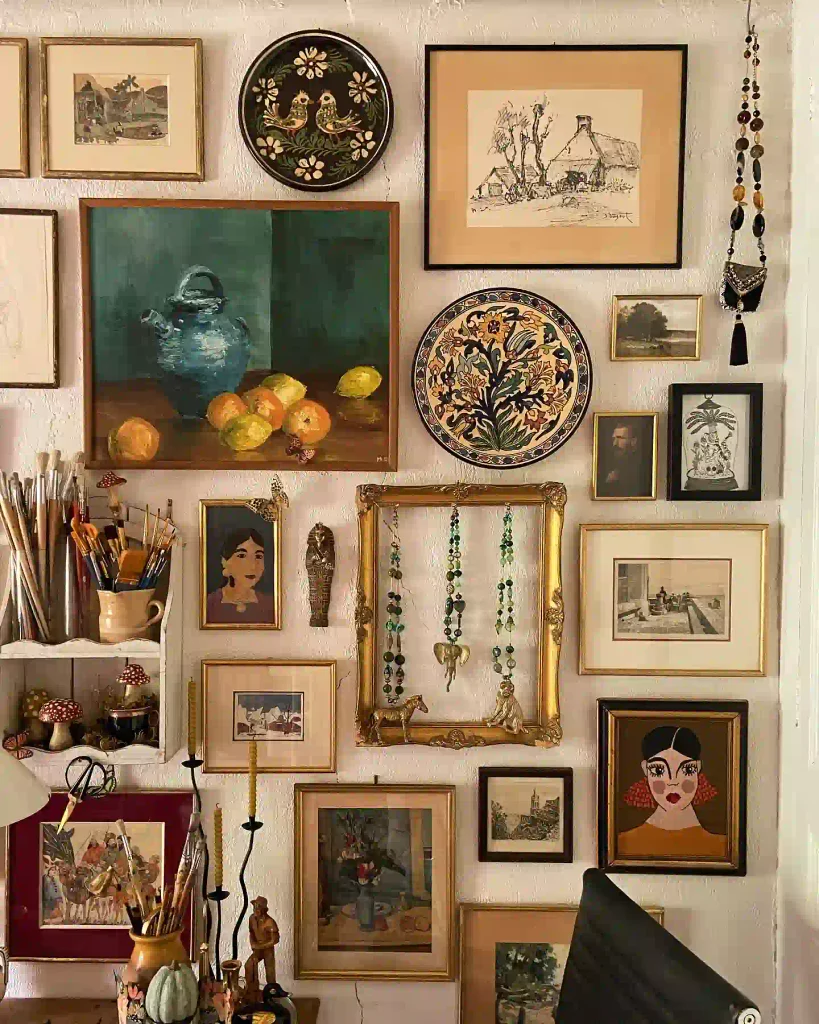
Stuck on what to hang next? Look at what you already own. Two round painted plates sit between the paintings here, and an empty gold frame holds beaded necklaces and small brass animals instead of art.
It’s a sneaky beginner move. Odd shapes break up the rows of rectangles, and you get to use pieces that would otherwise sit in a drawer.
Add things slowly. A wall like this looks collected because it grew over time.
- ▸Round plates, hung between rectangular frames
- ▸An empty frame used as a jewelry holder
- ▸A beaded strand hung from a single hook
- ▸Small brass animals perched on a frame edge
- ▸Tiny decorative butterflies on a frame corner
Final Thoughts on Gallery Wall Ideas for Beginners
Your first frame doesn’t have to be the right one. It only has to be the first one. Start with the biggest piece, copy the rule from the wall you liked most, and add one frame at a time. Step back often, and move things around before you reach for the hammer. Paper cutouts taped to the wall can help you test a spot.
When the wall finally feels right, you’ll know. If you’d like more gallery wall ideas to try at home, save this post to your Pinterest board and come back when you’re ready to hang the next frame.
Keep Reading: More DIY Room Decor
- Dopamine Decor Ideas: 8 Joyful Ways to Brighten a Room
- Apartment Decorating Ideas for Renters: 9 Looks That Feel Like Home
- Cricut Projects for Home Decor: 10 Easy Ideas to Make
- 9 Contact Paper Furniture Ideas for a One Weekend Makeover
- Browse all DIY room decor ideas
Amelia has decorated four rented flats and one small terrace in London. She writes about making ordinary rooms feel warm on a real budget, and tests lighting and layout ideas in her own home before recommending them.